Photo gallery (AS 3.0).
In this tutorial we will build a photo gallery. We will load the paths to the photos from an xml file and will use the Tweener class to add some nice transitions. You can download this class from Google Code download Tweener class. This is how the final product will look:
1. Create a new file by going to File > New select Flash file (ActionScript 3.0) and click Ok. Save the file as photo_gallery.fla.
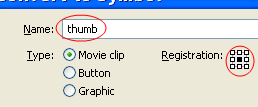
2. Select the Rectangle tool set the stroke to none and the fill to #999999 and on the stage draw a rectangle 110 by 110.Select the rectangle hit F8 to convert it to a MovieClip. Set its name to thumb and set the registration point to center and click Ok.
3. Press Ctrl+L to open the Library. Right click on the thumb MovieClip and select Linkage. Select Export to ActionScript checkbox, set the class name to Thumbnail and click Ok. Select the thumb MovieClip from the stage and delete it.
4. Press Ctrl+F7 to open the Components library. Select the UILoader component and drag it to the stage. We will use this component to load the thumbnails. Select the UILoader component from the stage and delete it, we don’t need it on the stage we need it in the Library (make sure that it’s in the library).
5. Go to File > New select ActionScript file and click Ok. We will build the Thumbnail class witch is associated with the thumb MovieClip.
6. Copy and paste the next code
Save the file as Thumbnail.as.
package{

  import flash.display.Sprite;

  import fl.containers.UILoader;

  import caurina.transitions.*;

  import flash.events.MouseEvent;


  public class Thumbnail extends Sprite {

    private var nume:String;

    private var url:String;

    private var id:int;

    private var loader:UILoader;

  public function Thumbnail(source:String,itemNr:int,numeThumb:String):void {

      url = source;

      id = itemNr;

      this.nume = numeThumb;

      drawLoader();

      addEventListener(MouseEvent.MOUSE_OVER,onOver);

      addEventListener(MouseEvent.MOUSE_OUT,onOut);

      scaleThumb();

  }

  private function drawLoader():void {

      loader = new UILoader();

      loader.source = url;

      loader.mouseEnabled = false;

      loader.x = -50;

      loader.y = -50;

      addChild(loader);

  }

  private function onOver(event:MouseEvent):void {

      Tweener.addTween(this, {scaleX:1,scaleY:1, time:1, transition:"easeoutelastic"});

      Tweener.addTween(this, {alpha:1, time:1, transition:"easeoutelastic"});

  }

  private function onOut(event:MouseEvent):void {

      Tweener.addTween(this, {scaleX:.9,scaleY:.9, time:1, transition:"easeoutelastic"});

      Tweener.addTween(this, {alpha:.5, time:1, transition:"easeoutelastic"});

  }

  private function scaleThumb():void {

      this.scaleX = .9;

      this.scaleY = .9;

      this.alpha = .5;

  }

 }

}
7. Let’s go back to the photo_gallery.fla. Name the first layer actions and insert a new one (Insert>Timeline>Layer) and name it background. In the Property Inspector click on the Size button and set the width: 570, height: 350, frame rate: 30 and click Ok.
8. Select the Rectangle tool set the color to black and the stroke to none. On the background layer draw a rectangle, same dimensions like the stage (570, 350) and position it at x: 0, y: 0.
9. Select frame 1 from the actions layer and press F9 to open the ActionScript panel. Copy and paste the next code.
import fl.containers.UILoader;

import caurina.transitions.*;

//---------loading the external xml file-------

var urlRequest:URLRequest = new URLRequest("pics.xml");

var urlLoader:URLLoader = new URLLoader();

var myXML:XML = new XML();

var xmlList:XMLList;

myXML.ignoreWhitespace = true;

urlLoader.addEventListener(Event.COMPLETE,fileLoaded);

urlLoader.load(urlRequest);

//--------holds the paths to the thumbnails-------

var arrayURL:Array = new Array();

//--------holds the paths to the big photos-------

var arrayName:Array = new Array();

//--------holds the thumbnails objects-------

var holderArray:Array = new Array();

//--------represents the number of collumns-------

var nrColumns:uint = 5;

//-------represents the container of our gallery

var sprite:Sprite = new Sprite();

addChild(sprite);

var thumb:Thumbnail;

//-------- the thumbnails container-------

var thumbsHolder:Sprite = new Sprite();

sprite.addChild(thumbsHolder);

//-------- the photoLoader container-------

var loaderHolder:Sprite = new Sprite();

loaderHolder.graphics.beginFill(0xffffff,1);

loaderHolder.graphics.drawRect(0,0,550,330);

loaderHolder.graphics.endFill();

loaderHolder.x = 1000;

loaderHolder.y = 10;

sprite.addChild(loaderHolder);

//-------- loads the big photo-------

var photoLoader:UILoader = new UILoader();

photoLoader.width = 540;

photoLoader.height = 320;

photoLoader.y = 5;

photoLoader.x = 5;

photoLoader.buttonMode = true;

photoLoader.addEventListener(MouseEvent.CLICK,onClickBack);

loaderHolder.addChild(photoLoader);

/* we loop through the xml file populate the arrayURL, arrayName and position the thumbnalis*/

function fileLoaded(event:Event):void {

    myXML = XML(event.target.data);

    xmlList = myXML.children();

    for (var i:int=0; i<xmlList.length(); i++) {

        var picURL:String = xmlList[i].url;

        var picName:String = xmlList[i].big_url;

        arrayURL.push(picURL);

        arrayName.push(picName);

        holderArray[i] = new Thumbnail(arrayURL[i],i,arrayName[i]);

        holderArray[i].addEventListener(MouseEvent.CLICK,onClick);

        holderArray[i].name = arrayName[i];

        holderArray[i].buttonMode = true;

        if (i<nrColumns) {

          holderArray[i].y = 65;

          holderArray[i].x = i*110+65;

        } else {

           holderArray[i].y = holderArray[i-nrColumns].y+110;

           holderArray[i].x = holderArray[i-nrColumns].x;

        }

        thumbsHolder.addChild(holderArray[i]);

    }

}

//----handles the Click event added to the thumbnails--

function onClick(event:MouseEvent):void {

    photoLoader.source = event.currentTarget.name;

    Tweener.addTween(thumbsHolder, {x:-650, time:1, transition:"easeInElastic"});

    Tweener.addTween(loaderHolder, {x:10, time:1, transition:"easeInElastic"});

    Tweener.addTween(thumbsHolder, {alpha:0, time:1, transition:"linear"});

    Tweener.addTween(loaderHolder, {alpha:1, time:1, transition:"linear"});

}

//----handles the Click event added to the photoLoader----

function onClickBack(event:MouseEvent):void {

    Tweener.addTween(thumbsHolder, {x:0, time:1, transition:"easeInElastic"});

    Tweener.addTween(loaderHolder, {x:1000, time:1, transition:"easeInElastic"});

    Tweener.addTween(thumbsHolder, {alpha:1, time:2, transition:"linear"});

    Tweener.addTween(loaderHolder, {alpha:0, time:2, transition:"linear"}); }
I provide a little comment (the lines that begins with //) for the variables and functions that tells you what they do or represents. If you have problem with the code fill free to ask.
10. The structure of the xml file looks like this:
<?xml version="1.0" encoding="utf-8"?>

<images>

  <image>

    <url>pics/img_1.png</url>

    <big_url>big_pics/img_1.png</big_url>

  </image>

  <image>

    <url>pics/img_2.png</url>

    <big_url>big_pics/img_2.png</big_url>

  </image>

<images>
Where <image></image> represents a new picture in the gallery. The url tag represents the path to the little picture and the big_url tag the path to the big picture. To add your own pictures you will need to modify these paths. Here I provide the tags for only two images, but the final xml file has 15 images. Open your text editor copy and paste the code from above add the rest of <image></image> tags (until 15) and save the file as pics.xml.
11. Let’s setup the structure of the folders. Make a folder and name it photo_gallery. Inside this folder make two new folders, name one pics and the other big_pics. Inside the photo_gallery folder place the photo_gallery.fla, Thumbnail.as, the pics.xml file and the caurina folder. You will obtain this folder (caurina) after downloading the Tweener class. You will need this folder if you want to modify the fla file. If you placed all the files in the right place, placed the little pictures in the pics folder and the big pictures in the big_pics you can test photo_gallery.fla file by pressing Ctrl+Enter. You should have no problem.
This is all. I hope that you enjoyed the tutorial. If you have questions, suggestions, doubts about the tutorial don’t hesitate to comment.
Until next time have fun learning Flash.
To view the gallery:view photo gallery. and to download the source file:download photo gallery.
UPDATE (04-12-2008)
Add description to images. Some of you asked how to add description to images, I have tried to respond on comments by giving some general tips (no code) but it seams that I haven’t done a good job so here it is. Add description to images step by step.
The new code is in bold; the other code is added to show where you need to insert the new code.
1. Modify the xml file - add a description tag to every image node, it should look like this:
<image>

  <url>pics/img_9.png</url>

  <big_url>big_pics/img_9.png</big_url>

  <description>Your description</description>

</image>
2. Modyfy Thumbnail.as class -find this line: private var index:int; and replace private with public like this: public var index:int; We make the index variable public to be able to access it from outside the class. This is not the best solution, we should try to keep our variables private and access them using get/set methods, but this will do it.
3. Add code to the photo_gallery.fla
var holderArray:Array = new Array();

//---------holds the images descriptions--------->

var descArray:Array = new Array();

loaderHolder.addChild(photoLoader);

//------format image description text--------

var txtFormat:TextFormat = new TextFormat();

txtFormat.color = 0XFFFFFF;

txtFormat.size = 14;

txtFormat.indent = 5;

txtFormat.font = "Verdana,Arial,sans_serif";

//--------a text field that holds the images description----------

var imgText:TextField = new TextField();

imgText.defaultTextFormat = txtFormat;

imgText.background = true;

imgText.wordWrap = true;

imgText.backgroundColor = 0X000000;

imgText.width = 530;

imgText.height = 40;

imgText.y = 285;

imgText.x = 10;

loaderHolder.addChild(imgText);

function fileLoaded(event:Event):void {

    myXML = XML(event.target.data);

    xmlList = myXML.children();

    for (var i:int=0; i<xmlList.length(); i++) {

        var picURL:String = xmlList[i].url;

        var picName:String = xmlList[i].big_url;

        //---populate the descArray with the description

        //----pulled from the xml file---

        var picDescription:String = xmlList[i].description;

        descArray.push(picDescription);

        . . .

    }

}

function onClick(event:MouseEvent):void {

    photoLoader.source = event.currentTarget.name;

    //----add the description text to the imgText-------

    imgText.text = descArray[event.currentTarget.index];

    . . .

}
You can download the updated source files: photo gallery updated.


Comments
thanks!
really nice advanced tutorial belongs to my mind. i searched for this. thanks
Acces of undefined property Tweener.addTween(this, {scaleX:1,scaleY:1, time:1, transition:"easeoutelastic"});
I don't know what's wrong, I have lots of problem with other trials too even with the sipliest tasks.
Some Advice?
"image
url image1.png /url
url image1_big.png /url
/image"
should work, doesnt it??
I don't know xml at all so sorry for stupid questions : P
btw.
Is there some easy way to change that shaking fing when big picture loads?
Tweener.addTween(loaderHolder, {x:10, time:1, transition:"easeInElastic"});
go to the Tweener class documentation and experiment with other types of transitions (you will find them under Transitions Types).
You will need to change the type of the transitions for example: transition:"easeInExpo".
When you click on next button first increment the currentPicture variable with one and set the source property of the photoLoader with the path just created.
Something like that:
currentImage++;
photoLoader.source = "big_pics/img_" + "currentImage" + ".png";
There are for sure other ways to achieve that but this comes to my head now.
This can be a starting point.
thanks!
You can use .flv files but you need to make some modifications. You need a video player in place of the Big image, when you click on a thumbnail that has the path to your .flv this will start playing in the video player. Video and sound will not play after you close the previous .FLV because you will handle that by placing a Go back button (or other solutions that you find) and when you click that button you will stop the video from playing and you will return to the thumbnails screen.
I read your tutorial, great one btw, and i tried to make a button that links to a URL, and i got the script working, but once i used it on the website, when i clicked it, i got an error message about security in the flash player, do you know how to get pass that or anything to do about it?
Would be great if you could email me if you knew
oni__90@hotmail.com
If not, you can read more about Flash player security here:Flash Player security and privacy.
For other site's AS3 lessons, i always seems to get this error “1037 The package cannot be nested” which i think is associated with this initial script.
...
package {
import flash.display.Sprite;
etc, etc
Any suggestion to overcome this?
MIke
Your web page has been a wonderful help. Thank you.
George
you can use the Tweener class to make the images fade in; you must work with alpha property. You can find more about the Tweener class by reading the online documentation.
George
very well tutorial,..
I have a principal swf what call the gallery (loadMovie("photo_gallery.swf",_root.mc_empty).
This swf is loaded , but don't load images and don't work.
please I need your help,
thanks!
renato
I love your gallery; it works great for me, I played around with the tweeners to adapt it! Now I would like to add buttons to the big pictures to scroll through them! I saw you explained something like this but could you explain it with more detail because i didn't quit understand it!!
Thanks!!!!
Thanks
Dodapb
Thanks
Thanks again for your wonderful work!!!
you can do something like this:
var myLoader:Loader = new Loader();
var fileURL:URLRequest = new URLRequest("your.swf")
yourbutton.addEventListener(MouseEvent.CLICK,loadSWF);
function loadSWF(event:Event):void{
myLoader.load(fileURL);
myLoader.contentLoaderInfo.addEventListener(ProgressEvent.PROGRESS,swfLoaded);
}
function swfLoaded(event:ProgressEvent):void {
if (event.bytesLoaded == event.bytesTotal) {
swf_Where_you_want_gallery_to_show
.addChild(myLoader);
}
}
I hope that this will help you.
???
mmm; I think I need some more AS 3.0 courses here...I really wouldn't know how to do all that. Do you have some concrete examples by any chance??
This is a quick explication; I think that it can help you to look at the url variable that is present in the code and fallow the same steps.
Go to, Adobe site and download or browse thru the Programming ActionScript 3.0 pdf. Search for Get and set accessor methods you will find a good explication there.
swf_Where_you_want_gallery_to_show
Let me make clear that I am happy for the gallery to open in an independent window or within an existing one. I just wish to trigger your super photo gallery to open via a button on my website.
+
I followed your guidance for the photo gallery so my swf file for the photos are all inside a folder called scotphoto which is inside the main folder for my site. Do I need to indicate within my code that the photo gallery swf is within this scotphoto folder? I am just wondering if the hierarchy of folders could cause it not to function correctly.
Regards
Dodapb
another way to contact/discuss with the authors and other users. ( FOUND IT NOW! ;] )
My specific question is: how to modify thumbnail's sizes?, although putting
different sized thumbs in the thumbs folder, they always still appear about
93x85px instead of 196x177px as required. (see screenshot)
My question: WHERE/how should I change the params? (4 cols, 2 rows)
Thank you for the cooperation
This "swf_Where_you_want_gallery_to_show" is your main swf, the swf where you want to load the gallery swf(I hope that is clear).If the main swf it’s in the same folder with the others swf (the photo gallery swf ) you don’t have to indicate within your code that the photo gallery swf is within this scotphoto folder.
Read with attention the tutorial, you will see that in step 2 I have draw a rectangle 110 by 110; you can change the thumbnail size here by drawing a rectangle that fits your needs.
Search thru the main code and you will find this line of code:
var nrColumns:uint = 5;
You can set here the numbers of columns; the number of rows will depend of your number of pictures.
The error code below mentions img_1.png but the image filenames I have used are not in this format. They have names and not numbers. No spaces between words. The photogallery works fine on it's own so I do not think it has a problem within. I have replaced the tags with * since I couldn't include them in the message.
Any advice would be appreciated.
Dodapb
TypeError: Error #1085: The element type "\big_pics/img_1.png*/big_url" must be terminated by the matching end-tag "*/\big_pics/img_1.png*/big_url*".
at Scotphoto_fla::MainTimeline/fileLoaded()
at flash.events::EventDispatcher/dispatchEventFunction()
at flash.events::EventDispatcher/dispatchEvent()
at flash.net::URLLoader/onComplete()
this is a really good tutorial, but i hope you can help me with the flowing problem:
if i add photos to the XML it is not showing. so i can use a scrollbar or pagination.
can you tell me how i add pagination? so if there are more pics buttons appear that let the user to navigate.
best regards
ron
if you put your own pictures you must change the name of the picture to the name I have used.
If you want to use your names you must modify the xml file and some lines of code, so I think that the first choice is easier. From the error that appears it seams that the xml file is not properly formatted. Look at the xml file that comes with the gallery and alter your xml to mach that xml.
Sorry for the delay.
base on the number of pictures from the xml files you can add pagination. In current state the gallery shows 15 pictures, if you have more pictures you can add a button (or more) to the gallery. When the user clicks on the buttons you can bring other screen with 15 pictures into user view or unload the current pictures and load others, your choice. I think that adding a scroll bar it’s much easy.
Good luck with the work.
Sorry for the delay.
Any help would be greatly appreciated.
Dodapb
you can make a new window and when you click the button that will load the gallery the new window will pop and the gallery will be loaded in this window.
You can modify the transition of the big picture but I can’t do it for you. Take a good book of ActionScript and start reading.
I don’t know what you did in Dreamweaver. Open the .fla in Flash, go to File>Publish Settings and make sure that the HTML checkbox is checked, after go to File>Publish. Go to the folder where you have the .fla file and test the html file that you will find there. See if it works (it worked for me) , if does maybe you do something wrong in Dreamweaver.
THank you very much for the tutorial and the knowledge. I would like to ask a question, if I may. I would like to change the size of my thumbnails. I have drawn a 16:9 box as my thumb at the size that I require, but the images are always a lot smaller leaving a large border. I cant seem to find how to change the actual image thumbnail size as a pose to the holder.
PLease help.
Thank you
look inside the Thumbnail.as there I setup the behaviors for the thumbnail.
In the tutorial the thumb has 110X110 and the picture 100X100 so maybe you must correlate the dimensions of the thumbnail with the dimensions of the image.
I am now having a large fundamental problem that I hope you can help me with. A bit cheeky maybe as it is not technically to do with the code you supplied, but I hope you can help as it is beginning to get frustrating.
THe premise is, that I have 4 buttons that are categories, when you click on the button a thumbnail gallery appears that reads from an xml file passed to the function and based on the category chosen.
you can then click on a thumbnail and the thumbnail gallery closes and a video starts.
THis all works fine at them moment.
What I cant seem to do though, is unload the previous gallery when the user clicks on a new button (category). I have tried removeChild only to be told that the child comes back as null or something similiar. Yet, removeChild works when executed from the thumbnail onclick event? It is as if it does not recognise it as being there once it has built the sprite?
I am very very stuck, please help if you can. It would be very much appreciated.
I suppose that you load your gallery into a loader, if so you can call loader.unload() from your buttons.
Inside the Thumbnail.as file set the dimensions of the loader to fit your needs
loader.width = 150;
loader.height = 100;
this should do it.
From what I now it’s not possible to unload a loaded XML file in Flash. When you load an xml file you assign that xml to an xml object and if you want to unload the xml you must delete the xml object.
Something like this:
gallery.xml // file that you load
myXML:XML = new XML() // your xml object
var urlRequest:URLRequest = new URLRequest("gallery.xml");
var urlLoader:URLLoader = new URLLoader();
urlLoader.load(urlRequest);
urlLoader.addEventListener(Event.COMPLETE,xmlLoaded);
function xmlLoaded(event:Event):void{
myXML = XML(event.target.data);
//--now the gallery.xml resides in myXML object
//-- to unload the gallery.xml you must delete the myXML object
}
"But then if i want to load the original pics.xml i can with a button click and vice versa."
You can make two xml objects and in each one to load the desired xml. When you click on one button one xml object is used and you parse the first xml and when you click the other button the next xml object is used.
I hope that my answer helps you.
I have done all things like you wrote but still it complain about:
Tweener.as, Line 846
"1046: Type was not found or was not a compile-time constant: Void.
private static function init():Void {"
and there is many of this kind of problems. Is it a wrong tweener file?
TypeError: Error #1085: The element type "images" must be terminated by the matching end-tag "< /images>".
at photo_gallery_fla::MainTimeline/fileLoaded()
at flash.events::EventDispatcher/flash.events:EventDispatcher::dispatchEventFunction()
at flash.events::EventDispatcher/dispatchEvent()
at flash.net::URLLoader/flash.net:URLLoader::onComplete()
Help me please :(
-Igor-
I can't tell you how to add description to photos because it's not so easy, to be able to tell you in a few words, but I can give you some ideas.
1. Add a description tag to the xml file. Each image tag will contain a url tag, big_url tag and a description tag.
2. Set an array that will hold the description tags (arrayDescription). Inside the fileLoaded function declare a variable that will hold the description (var picDescription:String = xmlList[i].description) and populate the arrayDescription.
3. Make a new TextField object (this will hold the description text) you need to add it to the same container that holds the big photos.
4. Inside the onClick function you must assign to the text property of the TextField object the description for the picture that you load (if you click on the first thumbnail, the first picture will be loaded and the first description must appear).
These are the steps that you must fallow; the details are up to you.
Sorry for my delayed response.
Your xml file is not well formatted. Download the source file and look there, it will help you.
read this tutorial: Preloading SWF, JPG, PNG or GIF files with AS 3.0. You will learn how to load a picture and the code it’s much simpler.
Go to FlashPerfection site, you will find a lot of good tutorials for all levels. There are a lot of sites with good flash tutorials, make a search on Google for flash tutorials. For sure you will find a tutorial that will show you hot to build a basic flash gallery. Good luck!
Very nice tutorial, is it possible to add more images? I added some images but the images are out of stage. Is it possible to add scroll bar on the right hand side and to link the images to another page instead of large image?
Thnx,
Ram.
Yes, it’s possible to add a scrollbar to scroll the container that holds the thumbnails; you will find a tutorial about how to build a scrollbar here on my blog.
For linking to another page you need to modify the xml file and replace the path to the big photos from the <big_url> with your url, after you need to amend the code and your done. Good luck!
You need to modify the big_url tag from every image tags. Now the big_url tag looks like this:
<big_url>big_pics/img_2.png</big_url>
The modified tag will look like this:
<big_url>http://biochimistu.blogspot.com</big_url>
You just replace the existing text with your url.
Replace the existing onClick function with this:
function onClick(event:MouseEvent):void {
var urlTo:URLRequest = new URLRequest(event.currentTarget.name);
navigateToURL(urlTo,"_blank");
}
This is all. If you don’t modify the xml file (but modify the onClick function) and click on a thumbnail the large photo will open in a new browser window.
Well, I've finished a site using your gallery which I adapted; take a look;
www.valentinroman.com
Thanx a lot!!!!!
Anne-Marie
I have looked at your site, simple, clean, nice. What I don’t like it's the width of the site it's to big, I think that it was better if you build it for 1024px.
Thanks for the link.
I'd like to control the pic dimension/position.
I've only been able to resize to tumbs frame but I couldn't change the pic size.
Is it possible to change it via XML?
Thanks for the nice tutotial!
I have one little question about transition effect whith Tweener class.
I made some symbiosis of your two tutors - this one and Scrolling photos dinamically with AS3.
In other words, I made scrooling thumbs menu and separated movieclip for loading the big size images. It works ok, but I would like to change these big images with transition effect.
I put this code to onClick function:
Tweener.addTween(photoLoader, {alpha:0, time:1, transition:"linear"});
photoLoader.source = event.currentTarget.name;
Tweener.addTween(photoLoader, {alpha:1, time:1, transition:"linear"});
Pictures change but without transition effect.
How can I get fade out, change picture and then fade in effect?
Or even effect when one picture is disappears above another one?
For example, like on this site:
http://www.cesare-paciotti.com/fullscreen.asp?lang=ita
Thanks, Alessandro
Try like this:
photoLoader.alpha=0;
photoLoader.source = event.currentTarget.name;
Tweener.addTween(photoLoader, {alpha:1, time:1, transition:"linear"});
add this lines inside the onClick function.
Thanks for the answer, it work fine now :)
thanks, Alessandro
I've used hours and hours - yes days on playing around with your gallery - but i just cant get a desc (description tag) to work ? I've tried following what oyu wrote above but I don't understand it - could you help me with this ? i'm sure there is others that lied to have a desc to their photos :D Awesome tutorial btw nice.
best regards simon.
I really hope you have the time to reply me on this -in advanced ty and ty very much for the gallery so far.
Best regards simon - sgaard66@hotmail.com
I will try to update the tutorial and show how to add description to images. I hope that I will post the update today.
Sorry for my delayed response.
ty very much biochimistu
ty!
best regards simon
Keep coming these kind tutorials.
I've enjoyed this tutorial - learnt a lot and I've now constructed my own gallery with a scroll bar.
However, one point - how do I pre-load the photos from XML? It will look better online if I can get the images to pre load and then the user can browse through the photos.
Thanks,
Kartik
The bit where you add description - I followed the extra bit of the tutorial top do this, but it comes up with the error message:
'ReferenceError: Error #1069: Property index not found on Thumbnail and there is no default value.at photo_gallery_fla::MainTimeline/onClick()'
I will probably write another tutorial in witch to address those things (add preloader to images, add a next and previous button) but I don’t know when. I can’t tell you in a few words how to do it yourself, it’s not complicated but I can’t do it in a few words.
You probably haven’t made the index variable public. Step 2 of the update.
5007: An ActionScript file must have at least one externally visible definition.
Make sure that your Thumbnail class is declared as public (public class Thumbnail), if this is not the case look at the source files and make sure that yours looks the same.