Build a Image Rotator using ActionScript 3 and XML
We will build a nice image rotator that has a navigation.
The image rotator works like this: the images are rotated at an interval of 5 seconds if the mouse cursor is outside the rotator area, when the mouse is over the rotator the rotation stops; when your mouse it's over one button from the navigation menu the rotator jumps to the corresponding slide.
This is how our image rotator will look.

1. Image rotator project structure.
Make a new folder a name it imageRotator, inside create the fallowing folder structure:- css
- xml
- images
- ro
- sorin
- utils
- sorin
The utils folder contains the TextLoader class, we will use this class to load the xml file and the CustomButton class, used to add navigation to our image rotator.
If you want to fallow the tutorial step by step download the classes and place them inside the utils folder.
2. Creating the rotator.xml file.
Make a new xml file with the same markup and content as bellow and save it as rotator.xml inside the xml folder. <?xml version="1.0" encoding="utf-8"?>
<rotator>
<slide>
<image>images/img_0.jpg</image>
<text><![CDATA[<p><b>Amsterdam</b> is the capital and largest city of the Netherlands, located in the province of North Holland in the west of the country.</br>The city, which had a population (including suburbs) of 1.36 million on 1 January 2008, comprises the northern part of the Randstad,the sixth-largest metropolitan area in Europe, with a population of approximately 6.7 million.<br><b><a href="http://en.wikipedia.org/wiki/Amsterdam" target="_blank">Find more...</a></b></p>]]>
</text>
<button_label>Amsterdam</button_label>
</slide>
<slide>
<image>images/img_1.jpg</image>
<text><![CDATA[<p><b>New York City</b>, the most populous city in the United States, is known for its status as a financial, cultural, transportation, and manufacturing center, and for its history as a gateway for immigration to the United States. According to the U.S. Department of Commerce, it is also a destination of choice for many foreign visitors. Both state and city were named for the 17th century Duke of York, James Stuart, future James II and VII of England and Scotland.<br><b><a href="http://en.wikipedia.org/wiki/New_york" target="_blank">Find more...</a></b></p>]]>
</text>
<button_label>New York</button_label>
</slide>
<slide>
<image>images/img_2.jpg</image>
<text><![CDATA[<p><b>Rio de Janeiro</b>, commonly referred to simply as Rio, is the capital city of the State of Rio de Janeiro, the second largest city of Brazil and the third largest metropolitan area and agglomeration in South America, 6th largest in the Americas.<br><b><a href="http://en.wikipedia.org/wiki/Rio_de_Janeiro" target="_blank">Find more...</a></b></p>]]>
</text>
<button_label>Rio de Janeiro</button_label>
</slide>
<slide>
<image>images/img_3.jpg</image>
<text><![CDATA[<p>The Republic of Venice was a major maritime power during the Middle Ages and Renaissance, and a staging area for the Crusades and the Battle of Lepanto, as well as a very important center of commerce (especially silk, grain and spice trade) and art in the 13th century up to the end of the 17th century. This made Venice a wealthy city throughout most of its history. It is also known for its several important artistic movements, especially the Renaissance period.<br><b><a href="http://en.wikipedia.org/wiki/Venice" target="_blank">Find more...</a></b></p>]]>
</text>
<button_label>Venice</button_label>
</slide>
<slide>
<image>images/img_4.jpg</image>
<text><![CDATA[<p><b>London</b> is the capital of England and the United Kingdom. It is the largest metropolitan area in the United Kingdom and the largest urban zone in the European Union by most measures. London has been a major settlement for two millennia, its history going back to its founding by the Romans, who called it Londinium.<br><b><a href="http://en.wikipedia.org/wiki/London" target="_blank">Find more...</a></b></p>]]>
</text>
<button_label>London</button_label>
</slide>
</rotator> Every slide tag contains the information for one slide from our rotator. The image tag contains the url to the image, the text tag holds the descriptions associated with every image, this description contains some html tags that we will add style to usind css. The button_label tag holds the label for one button from the rotator navigation.
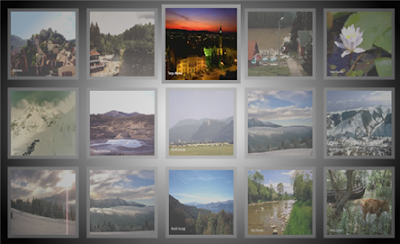
Download the rotator images and place them inside the images folder. If you want to use your own images the size used is 650X365, you should name your pictures img_0.jpg, etc. until img_4.jpg, the rotator will have five slides.
3. The imageRoatator.fla.
Create a new .fla file in the properties panel set the stage dimensions to 650X365, the frame rate to 30fps and set the document class to Main. Save the new .fla as imageRotator inside the imageRotator folder.
4. The Description class.
We use the Description class to add information to each slide.To create a Description object we need 5 parameters:
- description:String the information for the slide as a string
- cssURL:String the path to the css file used to stylize the description text
- textFieldWidth:uint the width of the text filed
- textFieldHeight:uint the height of the text field
- bgColor:uint the color of the background
Create a new ActionScript file, paste the code bellow and save it as Description.as inside the utils folder.
package ro.sorin.utils

{

import flash.display.Shape;

import flash.display.Sprite;

import flash.events.Event;

import flash.text.StyleSheet;

import flash.text.TextField;

import flash.net.URLLoader;

import flash.net.URLRequest;

/**

* ...

* @author Sorin

* @email: to.sorinn[at]gmail.com

* @blog: http://biochimistu.blogspot.com

*/

public class Description extends Sprite

{

private var textField:TextField;

private var description:String;

private var textFieldWidth:uint;

private var textFieldHeight:uint;

private var bg:Shape;

private var bgColor:uint;

private var cssStyle:StyleSheet;

private var cssLoader:URLLoader;

private var cssURL:String;

public function Description(description:String, cssURL:String, textFieldWidth:uint, textFieldHeight:uint, bgColor:uint)

{

this.description = description;

this.cssURL = cssURL;

this.textFieldWidth = textFieldWidth;

this.textFieldHeight = textFieldHeight;

this.bgColor = bgColor;

loadCss();

}

private function init():void

{

bg = new Shape();

bg.graphics.beginFill(bgColor,0.7);

bg.graphics.drawRect(0, 0, textFieldWidth, textFieldHeight);

bg.graphics.endFill();

addChild(bg);

textField = new TextField();

textField.styleSheet = cssStyle;

textField.multiline = true;

textField.width = textFieldWidth;

textField.height = textFieldHeight;

textField.htmlText = description;

textField.wordWrap = true;

addChild(textField);

}

private function loadCss():void

{

cssStyle = new StyleSheet();

var cssUrl:URLRequest = new URLRequest(cssURL);

cssLoader = new URLLoader();

cssLoader.load(cssUrl);

cssLoader.addEventListener(Event.COMPLETE,onCssComplete);

}

private function onCssComplete(event:Event):void

{

cssLoader.removeEventListener(Event.COMPLETE, onCssComplete);

cssStyle.parseCSS(event.target.data);

init();

}

}

}
We render the text used as description for slides as html and to make it pretty we use a css file. Create a new css file, paste the style bellow and save it as default.css inside the css folder.
p{ font-family:"Verdana", "Arial", "Helvetica", sans-serif;

font-size:13px;

color:#F8ECC2;

text-indent:5px;

margin-top:5px;

margin-left:5px;

}

a{ text-align:right; }

a:link{ color:#3366FF;

text-decoration:underline;

}
5. The Preloader class.
We use the Preloader class to display the loading progress. The Preloader class is simple, it has only one public function(function set text()) that we will call from the Main class to update the preloader progress. Create a new ActionScript file, paste the next code and save it as Preloader.as inside the utils folder.
package ro.sorin.utils

{

import flash.display.Sprite;

import flash.text.TextField;

import flash.text.TextFieldAutoSize;

import flash.text.TextFormat;

import flash.text.TextFormatAlign;

/**

* ...

* @author Sorin

* @email: to.sorinn[at]gmail.com

* @blog: http://biochimistu.blogspot.com

*/

public class Preloader extends Sprite

{

private var display:TextField;

private var textFormat:TextFormat;

public function Preloader():void

{

init();

}

private function init():void

{

display = new TextField();

textFormat = new TextFormat();

addChild(display);

configLook();

}

private function configLook():void

{

display.width = 350;

display.height = 50;

textFormat.align = TextFormatAlign.LEFT;

textFormat.color = 0xFF3399;

textFormat.size = 25;

textFormat.font = "Verdana, Times Roman, Arial";

display.defaultTextFormat = textFormat;

}

public function set text(progress:String):void

{

display.text = progress;

}

}

}
6. The Main class.
The Main class is the entry point to our application, if you haven't set the document class to Main in step 3 do this now. We will use as tween library the TweenLite library, download it and place it inside the imageRotator folder. Paste the bellow code into a new ActionScript file and save it as Main.as inside the imageRotator folder.
package

{

	/**

	  * ...

	  * @author Sorin

	  * @email: to.sorinn[at]gmail.com

	  * @blog: http://biochimistu.blogspot.com

	  */

	import flash.display.Sprite;

	import flash.display.Bitmap;

	import flash.display.Loader;

	import flash.display.Shape;

	import flash.events.Event;

	import flash.events.IEventDispatcher;

	import flash.events.ProgressEvent;

	import flash.net.URLRequest;

	import ro.sorin.utils.*;

	import flash.events.MouseEvent;

	import flash.events.TimerEvent;

	import flash.utils.Timer;

	import flash.display.StageAlign;

	import flash.display.StageScaleMode;

	import flash.net.navigateToURL;

	import com.greensock.TweenLite;

	import com.greensock.easing.Quad;

	public class Main extends Sprite

	{

		private var textLoader:TextLoader;

		private var xml:XML;

		private var xmlList:XMLList;

		private var urlList:Array = [];

		private var loader:Loader= new Loader();

		private var urlRequest:URLRequest;

		private var img:Sprite;

		private var bitmap:Bitmap;

		private var counter:uint = 0;

		private var nrImages:uint;

		private var imageList:Array = [];

		private var imgContainer:Sprite = new Sprite();

		private var preloader:Preloader = new Preloader();

		private var btnLabelsList:Array = [];

		private var btnList:Array = [];

		private var currentBtn:uint;

		private var currentImage:int = 0;

		private var bgMask:Shape = new Shape();

		private var isOver:Boolean = false;

		private var timer:Timer;

		private var descriptionList:Array = [];

		private var description:Description;

		public function Main():void

		{

			addEventListener(Event.ADDED_TO_STAGE, setStage);

		}

		private function setStage(event:Event):void

		{

			removeEventListener(Event.ADDED_TO_STAGE, setStage);

			stage.frameRate = 30;

			stage.scaleMode = StageScaleMode.NO_SCALE;

			stage.align = StageAlign.TOP_LEFT;

			stage.addEventListener(MouseEvent.MOUSE_OVER, stopTimer);

			stage.addEventListener(MouseEvent.MOUSE_OUT, startTimer);

			init();

		}

		private function init():void

		{

			textLoader = new TextLoader("xml/rotator.xml");

			textLoader.addEventListener(Event.COMPLETE, showLoaded,false,0,true);

			bgMask.graphics.beginFill(0xFF0000, 1);

			bgMask.graphics.drawRect(0,0, stage.stageWidth, stage.stageHeight);

			bgMask.graphics.endFill();

			addChild(preloader);

			preloader.x = stage.stageWidth / 2 - preloader.width / 2;

			preloader.y = stage.stageHeight / 2 - preloader.height / 2;

			addChild(imgContainer);

			imgContainer.mask = bgMask;

		}

		private function showLoaded(event:Event):void

		{

			textLoader.removeEventListener(Event.COMPLETE, showLoaded);

			xml = XML(event.target.content);

			textLoader = null;

			xmlList = xml.children();

			for (var i:int = 0; i < xmlList.length(); i++)

			{

				urlList.push(xmlList[i].image);

				btnLabelsList.push(xmlList[i].button_label);

				descriptionList.push(xmlList[i].text);

			}

			nrImages = urlList.length;

			loadImage();

		}


		private function loadImage():void

		{

			urlRequest = new URLRequest(urlList[counter]);

			loader.load(urlRequest);

			configureListeners(loader.contentLoaderInfo);

		}


		private function configureListeners(dispatcher:IEventDispatcher):void

		{

			dispatcher.addEventListener(Event.COMPLETE, addImage, false, 0 ,true);

			dispatcher.addEventListener(ProgressEvent.PROGRESS, showProgress, false, 0, true);

		}


		private function removeListeners(dispatcher:IEventDispatcher):void

		{

			dispatcher.removeEventListener(Event.COMPLETE, addImage);

			dispatcher.removeEventListener(ProgressEvent.PROGRESS, showProgress);

		}


		private function showProgress(event:ProgressEvent):void

		{

			var percent:Number = (event.bytesLoaded / event.bytesTotal) * 100;

			preloader.text= "(" + (counter + 1).toString() + "/" +nrImages.toString() + ")" + " Loading images " + (Math.ceil(percent)).toString();


		}


		private function addImage(event:Event):void

		{

			removeListeners(loader.contentLoaderInfo);

			bitmap = Bitmap(loader.content);

			img = new Sprite();

			description = new Description(descriptionList[counter],"css/default.css",bitmap.width / 3,bitmap.height,0X000000);

			img.addChild(bitmap);

			img.addChild(description);

			imageList.push(img);

			loader.unload();

			counter++;

			if (counter<=nrImages-1)

			{

				loadImage();

			}

			else

			{

				loader = null;

				removeChild(preloader);

				preloader = null;

				showImages();

			}

		}


		private function showImages():void

		{

			for (var i:uint = 0; i < imageList.length; i++)

			{

				imageList[i].name = i;

				imageList[i].x +=  i * imageList[i].width;

				imgContainer.addChild(imageList[i]);

			}

			setupTimer();

			setupButtons();

			setSelectedBtn(0);


		}


		private function stopTimer(event:MouseEvent):void

		{

			isOver = true;

			timer.removeEventListener(TimerEvent.TIMER,loadNext);

			timer.stop();

		}


		private function startTimer(event:MouseEvent):void

		{

			timer.addEventListener(TimerEvent.TIMER,loadNext,false,0, true);

			isOver = false;

			timer.start();

		}


		private function setupTimer():void

		{

			timer = new Timer(5000);

			timer.addEventListener(TimerEvent.TIMER,loadNext,false,0, true);

			timer.start();


		}


		private function loadNext(event:TimerEvent):void

		{

			if (! isOver)

			{

				if (currentImage<nrImages-1)

				{

					currentImage++;

				}

				else

				{

					currentImage = 0;

				}

				setSelectedBtn(currentImage);

				TweenLite.to(imgContainer, 0.5 ,{x: -(currentImage*650),ease:Quad.easeInOut});

			}

		}


		private function setupButtons():void

		{

			for (var i:int = 0; i< xmlList.length(); i++)

			{

				var customBtn:CustomButton = new CustomButton(btnLabelsList[i],130,50);

				customBtn.y = 315;

				customBtn.x = customBtn.width * i;

				addChild(customBtn);

				btnList.push(customBtn);

			}

			addBtnBehavior();

		}


		private function addBtnBehavior():void

		{

			for (var j:uint = 0; j < btnList.length; j++)

			{

				btnList[j].id = j;

				btnList[j].buttonMode = true;

				btnList[j].mouseChildren = false;

				btnList[j].mouseEnabled = true;

				btnList[j].addEventListener(MouseEvent.MOUSE_OVER,handleOver);

				btnList[j].addEventListener(MouseEvent.MOUSE_OUT,handleOut);

			}

		}


		private function handleOver(event:MouseEvent):void

		{

			currentBtn = event.currentTarget.id;

			currentImage = event.currentTarget.id;

			setSelectedBtn(currentBtn);

		}

		private function handleOut(event:MouseEvent):void

		{

			event.target.doOut();

		}


		private function setSelectedBtn(_id:uint):void

		{

			for (var k:uint = 0; k < btnList.length; k++)

			{

				if (_id==k)

				{

					btnList[k].doOver();

					TweenLite.to(imgContainer, 0.5 ,{x: -(k*650),ease:Quad.easeInOut});

					btnList[k].removeEventListener(MouseEvent.MOUSE_OVER,handleOver);

					btnList[k].removeEventListener(MouseEvent.MOUSE_OUT,handleOut);


				}

				else

				{

					btnList[k].doOut();

					btnList[k].buttonMode = true;

					btnList[k].mouseEnabled = true;

					btnList[k].addEventListener(MouseEvent.MOUSE_OVER,handleOver);

					btnList[k].addEventListener(MouseEvent.MOUSE_OUT,handleOut);


				}

			}

		}

	}

}
7. Testing the code
If you have fallowed the tutorial now it's time to see if everything works fine, press Ctrl + Enter to test the movie.I hope that you enjoyed the tutorial. If you have questions, suggestions, doubts about the tutorial don’t hesitate to comment.
Until next time have fun learning Flash.
Download the source files for here:Image Rotator.


Comments
I, however, been having a problem executing the file.
"ArgumentError: Error #2025: The supplied DisplayObject must be a child of the caller.
at flash.display::Loader/unload()
at Main/addImage()"
I have tried both following the tutorial and downloading the files and i couldn't get either one to work.
Any adjustments would be greatly appreciated.
P.S.I also found that several of the utility files were missing from the tutorial.
The other classes are not included in the tutorial because I have covered them in other tutorial, I have added links to that tutorial. Thanks for pointing this.
I downloaded the files again to see if i had changed something in the Main.as file on accident. I copied and pasted the com file from the Greensock tweenlite. Then i opened the main.swf and the imageRotator.swf neither loaded beyond the preloader.
I am using CS3 flash, and cant open the fla files because the file formats don't match....which i am guessing means you use either CS4 or CS5. So, I can't recompile the file....I don't know if that the problem.
I get the error when i recreate the imageRotator.fla in CS3. I don't know why that would give me the error...Any advice that you can give me I would really appreciate it.
Try this : image rotator made with FlashDevelop , I have used the FlashDevelop to write the rotator, now the Flash Professional version won't be a problem since we don't have a .fla file( you will still need to add the GreenShock library).If you don't have FlashDevelop you can download it from: http://www.flashdevelop.org/community/viewtopic.php?f=11&t=7607
That worked great. I wish i knew what the original problem was but thank you for the tutorial and the help.