Posts

Actionscript 3.0 Xml driven menu.

Image
We will build a menu witch is powered by an xml file; this offers a lot of flexibility because you can add/remove buttons by modifying the xml file and not by modifying the .fla file. The buttons will maintain they down state when clicked. We will not have any code on the timeline, all the code will reside in external classes, so it’s not only an xml driven menu it’s also coded in OOP style. We will use something called optional parameters ; they are parameters that have a default value. To better understand this, let look at a simple example. function sayMyName(name:String = "Sorin"):void { trace (name); } //We have a function with a parameter called name witch has a default value(Sorin), //if we call the function with no parameter passed to it the output will be Sorin sayMyName(); output: Sorin //if we call the function with a custom value("Elvis") the function will output Elvis sayMyName("Elvis"); output: Elvis Here is how the menu look...

ActionScript 3 button that stay in the down state.

Image
In this tutorial we will build a button (in fact is a movieclip that acts like a button and we will not build a button, we will make a menu) that has an over state, an out state and a down state. Like the title says the button will stay in the down state when is clicked (selected) and because the selected button will look different from the others buttons the user will know exactly on what page is.This is how the menu will look: 1. Create a new file by going to File > New select Flash file (ActionScript 3.0) and click Ok. Save the file as myButton.fla. 2. Insert a new layer (Insert>Timeline>Layer), name the layers beginning from the top: actions and buttons . In the Property Inspector set the frame rate to 30. 3. Select the Rectangle tool set the stroke to none, pick a color (I have picked black) and on the buttons layer draw a rectangle. Set the measurements of the rectangle as fallows: width = 170, height = 40. Select the rectangle and press F8 to convert it to a MovieClip....

Scrolling photos loaded dynamically with ActionScript 3.

Image
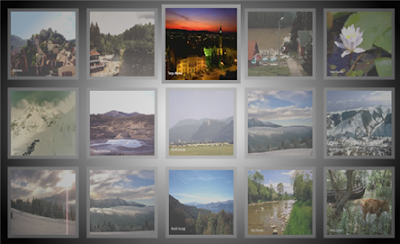
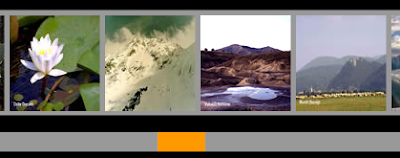
In this tutorial we will learn how to scroll some photos that we will load dynamically from an xml file and we will scroll the photos using a custom scrollbar. We will use again the Tweener class to add a nice transition. You can add as much photos as you like.For this Flash tutorial we will use the Thumbnail class that we have used in the Photo Gallery tutorial but with some little modification. This is how the final product will look: 1. Create a new file by going to File > New select Flash file (ActionScript 3.0) and click Ok. Save the file as scrolling_photos.fla . 2. Select the Rectangle tool set the stroke to none and the fill to #999999 and on the stage draw a rectangle 110 by 110.Select the rectangle hit F8 to convert it to a MovieClip. Set its name to thumb and set the registration point to center and click Ok. 3. Press Ctrl+L to open the Library. Right click on the thumb MovieClip and select Linkage. Select Export to ActionScript checkbox, set the class name to Thumbn...

Photo gallery (AS 3.0).

Image
In this tutorial we will build a photo gallery. We will load the paths to the photos from an xml file and will use the Tweener class to add some nice transitions. You can download this class from Google Code download Tweener class . This is how the final product will look: 1. Create a new file by going to File > New select Flash file (ActionScript 3.0) and click Ok. Save the file as photo_gallery.fla . 2. Select the Rectangle tool set the stroke to none and the fill to #999999 and on the stage draw a rectangle 110 by 110.Select the rectangle hit F8 to convert it to a MovieClip. Set its name to thumb and set the registration point to center and click Ok. 3. Press Ctrl+L to open the Library. Right click on the thumb MovieClip and select Linkage. Select Export to ActionScript checkbox, set the class name to Thumbnail and click Ok. Select the thumb MovieClip from the stage and delete it. 4. Press Ctrl+F7 to open the Components library. Select the UILoader component and drag it to th...

Control sound volume.

Image
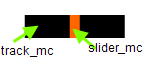
In this tutorial we will learn how to control the volume of the sound that we play in Flash.Adding sound to your site can improve the user experience but not offering a way to control the sound could irritate the user and make him go away forever, and we don’t want that. We will build a slider that will help us to increase or decrease the sound volume and will learn how to load mp3s that we import in the Flash Library. 1. Create a new file by going to File > New select Flash file (ActionScript 3.0) and click Ok. 2. On the stage draw a rectangle width: 100 px, height: 23 px, color: black and stroke: none. With the rectangle selected press F8 and convert it to a MovieClip. Set its name to track_mc and registration point to top left and click Ok. In the Property Inspector set its instance name to track_mc. 3. Double click on the track_mc MovieClip to edit it. Lock the current layer. Insert a new one, double click on its name and rename it slider. Draw a rectangle width: 10, height: ...

Random stars with blur filter applied(ActionScript 3.0).

Image
In today tutorial we will make a very cool effect. We will apply some random values to some properties of a MovieClip that has a little animation and a blur filter applied to it, this approach will produce a nice organic effect. You must read it the result is fun and cool. 1. Create a new file by going to File > New select Flash file (ActionScript 3.0) and click Ok. 2. Go to Insert > New Symbol, name the symbol particle and click Ok. 3. In the Tools panel select the PolyStar tool. In the Property Inspector click on the Options button, expand the combo box and select star and click Ok. In the same Property Inspector set the stroke to none and pick a yellow color. Put your cursor on the center of the stage (the center is mark by the addition sign) click and drag to draw a star about 40 by 40.Double click on the layer name and name it particle. 4. Insert a new layer by going to Insert > Timeline > Layer. We will use this layer as a guide. Select the Rectangle tool and draw t...

Flash Video basics.

Hello everybody. In this tutorial we will learn how to work with video files in Flash. We will use only the Flash IDE no line of ActionScript code. This method is fast and allows you to display and control video files without having to know ActionScript. To get starting we need a video file, you can use your own file or if you don’t have one go to masternewmedia it has a good list of sites taht provides free public domain movies. The fallowing file formats can be used: asf, .avi, .dv, .mov, .mp4, .mpeg and .wmv. Pick a video file with a size less that 10 MB (this is not a condition, you can use a much larger file but will take a long time to convert it to a flv(Flash Video file)). 1. Create a new file by going to File > New select Flash file (ActionScript 3.0) and click Ok. 2. Save you file in a new folder. 3. Go to File > Import > Import Video this will open the Select Video screen . Click on the Browse button, browse to your hard drive and select the video file that you w...