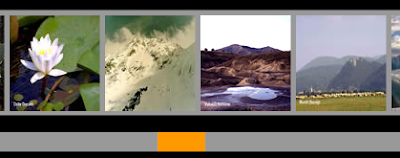
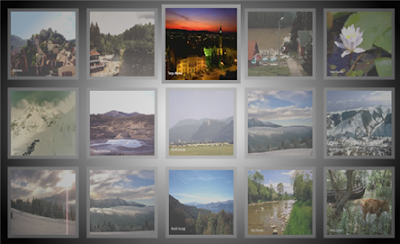
Scrolling photos loaded dynamically with ActionScript 3.
In this tutorial we will learn how to scroll some photos that we will load dynamically from an xml file and we will scroll the photos using a custom scrollbar. We will use again the Tweener class to add a nice transition. You can add as much photos as you like.For this Flash tutorial we will use the Thumbnail class that we have used in the Photo Gallery tutorial but with some little modification. This is how the final product will look:
1. Create a new file by going to File > New select Flash file (ActionScript 3.0) and click Ok. Save the file as scrolling_photos.fla.
2. Select the Rectangle tool set the stroke to none and the fill to #999999 and on the stage draw a rectangle 110 by 110.Select the rectangle hit F8 to convert it to a MovieClip. Set its name to thumb and set the registration point to center and click Ok.
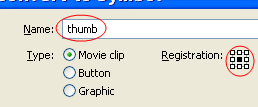
3. Press Ctrl+L to open the Library. Right click on the thumb MovieClip and select Linkage. Select Export to ActionScript checkbox, set the class name to Thumbnail and click Ok. Select the thumb MovieClip from the stage and delete it.
4. Go to File > New select ActionScript file and click Ok. We will build the Thumbnail class witch is associated with the thumb MovieClip.
5. Copy and paste the next code Save the file as Thumbnail.as.
package{

  import flash.display.Sprite;

  import flash.display.Loader;

  import flash.net.URLRequest;

  public class Thumbnail extends Sprite {

    private var url:String;

    private var loader:Loader;

    private var urlRequest:URLRequest;

    function Thumbnail(source:String):void {

        url=source;

        drawLoader();

    }

    private function drawLoader():void {

        urlRequest=new URLRequest(url);

        loader=new Loader;

        loader.mouseEnabled=false;

        loader.load(urlRequest);

        loader.x=-50;

        loader.y=-50;

        addChild(loader);

    }

  }

}
6. Go back to the scrolling_photos.fla. Insert two new layers (Insert>Timeline>Layer), name the layers beginning from the top: actions, scrollbar and photos _masker. In the Property Inspector click on the Size button and set the width: 550, height: 200, frame rate: 30, background color: black and click Ok.
7. Select the Rectangle tool set the stroke to none, pick a color (the color doesn’t matter because we will use this rectangle as a mask and the color won’t be visible) and on the photos_masker layer draw a rectangle. Set the measurements and the position of the rectangle as fallows: width = 550, height = 135, x = 0 and y = 0. Select the rectangle and press F8 to convert it to a MovieClip. Set its name to thumb_holder, the registration point to top left and click Ok. In the Property Inspector set its instance name to thumb_holder.

8. Lock the photos_masker layer. On the scrollbar layer draw a rectangle (width = 550, height = 20, x = 0, y = 140, stroke = none, color= #999999). Select the rectangle and press F8 to convert it to a MovieClip. Set its name to track, the registration point to top left and click Ok. In the Property Inspector set its instance name to track.
9. On the same layer draw another rectangle (width=50, height = 20, stoke = none and color = #FF9900).Convert it to a MovieClip, set its name to handler, the registration point to top left and click Ok. In the Property Inspector set its instance name to handler and position it at x=0 and y = 140.
10. Select frame 1 from the actions layer and press F9 to open the ActionScript panel. Copy and paste the next code.
import caurina.transitions.*;

//---------loading the external xml file-------

var urlRequest:URLRequest = new URLRequest("pics.xml");

var urlLoader:URLLoader = new URLLoader();

var xml:XML;

var xmlList:XMLList;

urlLoader.load(urlRequest);

urlLoader.addEventListener(Event.COMPLETE,urlLoaded);

//--------------holds the thumbnail objects------

var arrayThumb:Array = new Array();

//---------the container of the thumbnails--------

var photoContainer:Sprite =  new Sprite();

addChild(photoContainer);

//-----------set the thum_holder as a mask for the photoContainer

photoContainer.mask=thumb_holder;

/* ----loop through the xml file, populate the arrayThumb, position the thumbnails and add the thumbnails to bigHolder*/

function urlLoaded(event:Event):void {

    xml = XML(event.target.data);

    xmlList = xml.children();

    for (var i:int=0; i<xmlList.length(); i++) {

        var thumb:Thumbnail = new Thumbnail(xmlList[i].url);

        arrayThumb.push(thumb);

        arrayThumb[i].y = 67.5;

        arrayThumb[i].x = i*100+55;

        photoContainer.addChild(thumb);

    }

}

var minScroll:Number = 0;

var maxScroll:Number = track.width-handler.width;

var draging:Boolean = false;

//--------------set the limits in witch the handler ca be dragged-----------

var bounds:Rectangle = new Rectangle(handler.x,handler.y,maxScroll,0);

//----------shows the hand cursor when mouse is over the handler-----------

handler.buttonMode = true;

handler.addEventListener(MouseEvent.MOUSE_DOWN,beginDrag);

//---------- handles the MOUSE_DOWN event--------------------

function beginDrag(event:MouseEvent):void {

    handler.startDrag(false,bounds);

    draging = true;

    handler.addEventListener(Event.ENTER_FRAME,checkingProgress);

    stage.addEventListener(MouseEvent.MOUSE_UP,endDrag);

}

//---------handles the MOUSE_UP event------------

function endDrag(event:MouseEvent):void {

    handler.stopDrag();

    draging = false;

}

/*---------checking the x position of the handler and update the x position of the photoContainer based on position of the handler---------*/

function checkingProgress(event:Event):void {

    var procent:Number = handler.x/maxScroll;

    if (draging) {

        Tweener.addTween(photoContainer,{x:(-procent*(photoContainer.width-thumb_holder.width)),time:1});

    }

}
11. The structure of the xml file looks like this:
<?xml version="1.0" encoding="utf-8"?>

<images>

  <image>

    <url>pics/img_1.png</url>

  </image>

  <image>

    <url>pics/img_2.png</url>

  </image>

</images>
Where <image></image> represents a new picture in the gallery. The url tag represents the path to the picture. Open your text editor copy and paste the code from above add the rest of <image></image> tags (as much as you like) and save the file as pics.xml.
12. Make a folder and name it scrolling_photos. Inside this folder make another folder, and name it pics(inside this folder place your photos). Inside the scrolling_photos folder place the scrolling_photos.fla, Thumbnail.as, the pics.xml file and the caurina folder. You will obtain this folder (caurina) after downloading the Tweener class. You will need this folder if you want to modify the fla file. Test your .fla file by pressing Ctrl+Enter. Everything should work just fine.
This is all. I hope that you enjoyed the tutorial. If you have questions, suggestions, doubts about the tutorial don’t hesitate to comment.
Until next time have fun learning Flash.
Download the source files for here: scrolling photos tutorial.


Comments
You must work with the height and y property and you must scroll the container of the thumbnails (thumbsHolder).I have another tutorial in witch the scrollbar is vertical: Custom scrollbar you can inspire from there. You have all the pieces you just need to put them together.
I just wanted to ask a question, I have downloaded all de necesary files, included de caurina, and I tried to modify the color and shapes of the prepoader and when I save it and publish it with Crtl + Enter, it doesn´t work, I can´t see the images. I guess i did something wrong. Do I have to publish it in a special way?
I´m quite new in as3...
Thanking in you in advance.
where is the script to adjust the speed and the script for the placement of the handler and track?
thanks
:|
I did it this way:
-first I have added a node in my xml file called description and added inside the tags some text
-setup a array that will hold the descriptions
var arrayDescription:Array = new Array();
- inside the for loop I added these lines of code:
var picDescription:String = xmlList[i].description;
arrayDescription.push(picDescription);
arrayThumb[i].name = arrayDescription[i];
arrayThumb[i].addEventListener(MouseEvent.CLICK,showDescription);
and finally the showDescription function
function showDescription(event:MouseEvent):void{
trace (event.currentTarget.name);
}
inside this function you can add the description text to a text field to show in your movie,
something like this:
myTextField.text = String(event.currentTarget.name);
I hope that this will help you.
that Symbol 1 from the Library is not too important and doesn’t affect the tutorial. I have used it so when you mouse over the thumb the hand cursor to appear.
Claus
you can modify the pictures dimensions in the step tow of the tutorial, but after you will need to modify others dimensions too(stage dimensions, track) and some lines of code.
Sorry for delay.
Claus
If you have modified the dimensions test the .fla and see what you receive.
Look at those lines:
arrayThumb[i].y = 67.5;
arrayThumb[i].x = i*100+55;
to adjust the position of the thumbnails.
I don’t know how you setup your file but you should scroll the movieclip that holds the loaded content (thumbnails, movieclips).When you move the scrollbar the x (or y) position of your movieclip should change.
But here it is an alternative one: scrolling photos.
Error #2044: Unhandled IOErrorEvent:. text=Error #2035: URL Not Found.
Error #2044: Unhandled IOErrorEvent:. text=Error #2035: URL Not Found.
Error #2044: Unhandled IOErrorEvent:. text=Error #2035: URL Not Found.
Error #2044: Unhandled IOErrorEvent:. text=Error #2035: URL Not Found.
And don't see the images. Why?
The error say that a URL is not found, so maybe you have not provide the proper url for the xml file. You should also download and place inside the gallery folder the Tweener class.
How do I remove the grey backgrounds behind the images?
Thanks,
Neil
The example is build with that bg in mind. You can get rid of the grey background; one way will be to increase the dimensions of the images from the pics folder now they are 100X100 make them 110X110, the grey bg will be hidden. You will need to reposition the loader inside the Thumbnail class.
This is a great tutorial.
Question...ive repositioned the track.x by 250px from the left. But when i do this, the container jumps when i begin to drag and it does not scroll correctly at the end of the arrayThumb. Here's is my link: www.davidmcneal.com/as3/gallery_scrolling.html
How is this done correctly?
Move the others assets by 250 pixels too (thumb_holder, photoContainer) and change this line:
Tweener.addTween(photoContainer,{x:(-procent*(photoContainer.width-thumb_holder.width)),time:1});
To this:
Tweener.addTween(photoContainer,{x:(250-procent*(photoContainer.width-thumb_holder.width)),time:1});.
If you still have problems place the handler movieclip inside the track movieclip and change the code to reflect this move.
I'm a newbie at flash and am following this tutorial but am stuck at step 11.
Where does the xml file go? Have no idea where to click from the last step!!
Would love some help, Thanks
Could the problem be that I am using Flash Professional 8 and its only action script 2 not 3?
Your error code says that you haven’t declared arrayThumb and thumbDescription properties, so you should do it. Read careful the comment in witch I have explained how to add description to images.
do you have as2 ver of this tutorial?...
i really need this kind of script,...
thanks ahead,...
rynzco
Sorry, but I don’t have the as2 version of the script. Make a in depth search on Google, you will find for sure a similar script.
When you navigate away from the gallery remove the photoContainer from the stage and set the alpha property for thumb_holder and track to 0.Don't forget to add the photoContainer to the stage and to set the alpha property for the thumb_holder and track to 1 when you want to access the gallery page.
I have modified the code (Thumbnail class) and now every image has a preloader.
You can download it from: Scrolling photos loaded dynamically with actionscript 3.