Photo Gallery with transitions(AS 3.0).
In this tutorial we will make a Photo Gallery.Will use ActionScript 3.0 because we want to leave ActionScript 2.0 in the back.ActionScript 3.0 it’s much cleaner and powerfull.
Our gallery will look like the old Polaroid photos. We will learn how to load external content, how to setup a timer, how to work with transitions and other things.
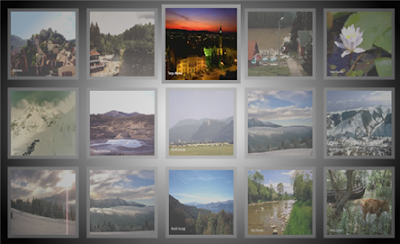
The finally gallery will look like this:

First let’s build the graphical part.
- 1.Go to File – New select Flash file(ActionScript 3.0) and click Ok.
- 2.Add three new layers (Insert – Timeline – Layer).
- 3.Now we should have four layers. Select the first layer from the bottom double click on his name and rename it to frame. Select the next layer name it bg, select the next layer name it display and finally set the name of the last layer to actions and lock it.
Your timeline should look like this:

- 4.In the Properties panel change the color of the stage to black.
- 5.Select the frame layer, pick the Rectangle tool set it’s stroke to none and the fill to white and draw a rectangle with the width = 350 and height = 350 (a square).Set it’s X value to 100 and Y to 25.This will put the rectangle in the middle of the stage.
- 6. Lock the frame layer, select the bg layer and with the rectangle tool (stroke: none and fill: black) draw a rectangle with width = 320 and height = 240 set it’s position to X= 115 and Y = 52.
- 7.Lock the bg layer, select the display layer and with the rectangle tool (stroke: none and fill: black) draw a rectangle with width = 320 and height = 240 set it’s position to X= 115 and Y = 52.With the rectangle selected hit F8 to convert it to a symbol. Set it’s name to frame, it’s type to MovieClip and the registration point in the top left like and hit ok.In the Properties Inspector set its instance name to frame.

Ok the graphical part is over.
Now let’s setup the structure of our folders.
On your hard drive make a folder name it Polaroid_gallery ( or else it’s your choice).In this folder make another one and name it photos. In this folder you will put your photos , the photos must have 320 width and 240 height.
Back in the main folder (Polaroid_gallery) right click New – Text Document name this file photosNumber.txt. Double click on this file to open it and type : totalPics = 5.
5 in my case it’s the number of photos that I have in the photos folder, if you have more photos type the number of your photos.
Back in the Flash save our file in the Polaroid_gallery name it how you want I name it polaroid_gallery.fla.
Let’s recap. In the Polaroid_gallery folder you must have:
- a file named photosNumber.txt
- a folder named photos
- the fla file named polaroid_gallery.fla
If everything is ok let’s continue with the ActionScript 3.0 code.
- Go to frame 1 in actions layer hit F9 to open the ActionScript panel copy the next code and paste it in the panel.
1. import fl.transitions.*;

2. import fl.transitions.easing.*;

3. var photoCounter:int = 1;

4. var photoNumber:int;

5. var photoTimer:Timer;

6. var photoNumberRequest:URLRequest = new URLRequest("photosNumber.txt");

7. var photoNumberLoader:URLLoader = new URLLoader(photoNumberRequest);

8. photoNumberLoader.dataFormat = URLLoaderDataFormat.VARIABLES;

9. photoNumberLoader.addEventListener(Event.COMPLETE,photoNumberComplete);

10. function photoNumberComplete(event:Event):void

{

 photoNumber = int(event.target.data.totalPics);

 photoTimer = new Timer(4000);

 photoTimer.start();

 photoTimer.addEventListener(TimerEvent.TIMER,showPhoto);

}

11. function showPhoto(event:TimerEvent):void

{

 var photoLoader:Loader = new Loader();

 photoLoader.load(new URLRequest("photos/Romania_" +photoCounter+ ".png"));

 photoLoader.contentLoaderInfo.addEventListener(Event.COMPLETE,loadComplete);

 photoCounter +=  1;

 if (photoCounter >photoNumber)

 {

  photoCounter = 1;

 }

}

12. function loadComplete(event:Event):void

{

 var photo:Sprite = new Sprite();

 addChild(photo);

 photo.addChild(event.target.content);

 frame.addChild(photo);

 if (photoCounter%2 ==0)

 {

  TransitionManager.start(frame, {type:Iris, direction:Transition.IN, duration:2,easing:Strong.easeOut, startPoint:5, shape:Iris.SQUARE});

 }

 else

 {

  TransitionManager.start(frame,{type:Fly, direction:Transition.OUT, duration:3,easing:Strong.easeInOut, startPoint:3});

 }

}
In line 1 and 2 we imported some classes we will need them in our code.
Next we setup a variable that will keep count of current photo (photoCounter), one that will hold the total numbers of pictures (photoNumber) and a variable for our Timer(photoTimer).
In lines 6,7,8,9 we request the data(URLRequest("photosNumber.txt")) , load the data (
URLLoader(photoNumberRequest)) and add a COMPLETE event that will fire when our data is complete loaded.
In line 10 we handle our Event.COMPLETE. After the data is complete loaded we assign
the number of picture from the external file (photosNumber.txt) to our photoNumber variable. Setup a timer witch fires every 4 seconds and loops forever (or not if you close the swf it stops) , start the timer and add a TIMER event.
In line 11 we handle the TIMER event. In this function we setup a loader that will load our photos (photoLoader), request the file (URLRequest("photos/Romania_" +photoCounter+ ".png") and add another Event.COMPLETE for our loader.
The "photos/Romania_" +photoCounter+ ".png" represent the path to our photos.
In the same function we increase our photoCounter by 1, this variable will be increased every 4 seconds (the interval on witch fires our timer).And we setup a if condition that will reset our photoCounter to 1 if photoCounter becomes equal to photoNumber variable.
In line 12 we display our loaded photos to stage and add a little transitions to them.
And that it’s all.
I hope that I was clear enough.
If you have questions, suggestions, doubts about the tutorial don’t hesitate to comment.I will see you on next tutorial.
You can download the source file from here:Photo Gallery with transitions


Comments
fun tutorial. thank you.
when i author my version of the AS code i receive 3 compiler errors with the TransmissionManager: Access of undefined property frame.. Do you have any suggestions i could try?.. also is there a missing "a" (messageTween) in the following: messgeTween.start(); ??
thank you!
Select the frame MovieClip(it's on the display layer)and in the Property Inspector set its instance name to frame.
It's not a missing "a" this is the name that I have used.Yes in english it shoud be message but in code messge works fine.
If you have problems download the source files and confront your file with that.
Please tell me if my answer solved the problem.
thanks for your reply. i had a few issues to contend with, but after downloading your example and getting it to work, I have been able to hack mine into working somewhat, although currently it only displays the first photo over and over.... i at least have one that runs and thats a start. again thank you so much for your help!!!
Thank's for your tutorial.
Just a missing :
I had an error "Access to property is not set" because you forgot to explain we must build a new symbol name "message" (with some text for exemple).
Thanks for pointing that to me.
I have a problem though, i already started designing my website in AS2,
befor i found your tutorial
Is there anyway to change this to AS2
I'am not verry good with AS, so if thay is a easy way, that would be great
Also I have 2 buttons , a next and a back button, i was woundering if you click the thumb and load the big pic up, would thay be a way to make my next and back buttons go though the big pictures in order, without having to go back to the thumbs to load another big pic
And another question, will it be easy to attatch a preloader on all the images.
Thanks in advanced
Craig
You can try to change the gallery to as2 but I think that it’s not a good idea. The trend it’s from as2 to as3 but it’s your choice. You can search for a gallery made in as2 (you will find one for sure) and adapt that to your needs.
About the next and a back buttons read the comments from the other gallery(I think that you post the comment on the wrong gallery).
I managed to make everything work as intended but them I thought this would also look great as a links page using only the thumbs images. This is where my problems started:
1) tried to edit the xml with the links the instead of the full picture.
2) changing the photoLoader container so it opens a new page every time I click on the thumbnail
No luck so far (It doesn't help I just started dabbing in AS).
Any tips?
I think that your comment was on the other gallery (Photo gallery (AS 3.0)) so I will post my response on that page.
just a quick note. Loader won't ignore spaces in txt file. That causes total foto count to be 0, looping on 1st image.
Turn off the Script Assist mode. Don't forget to remove the numbers before the lines of code.